How to Take High-Definition YouTube Video Screenshots
William Davis | Updated on 2025-12-03
You just spotted the absolute perfect frame in a viral clip, didn't you? Maybe it's a jaw-dropping moment for a thumbnail or a meme that simply must be shared. But here’s the painful part: trying to grab it usually leaves you with a pixelated disaster. Seriously, who has time for those fuzzy, blurry screenshots? I know you want that crisp, clean HD quality image! Let’s ditch the low-quality grabs right now. This is the simplest, most effective YouTube screenshot guide you'll ever need to capture video frame content like a true professional.
Contents
The Blurry Trap: Why Your Standard Screen Grab Fails
Let’s talk truth: using your basic "Print Screen" key is the reason your grabs look like they were taken on a flip phone. Standard screen-snapping tools only capture a static picture of what your monitor displays. They don't pull the actual raw, high-resolution image data from the streaming video file. If your goal is to have professional, visually stunning content—something that really pops—you must change your method. A sharp, high-definition screenshot is non-negotiable for anyone serious about digital media. Why waste time on a low-quality YouTube video screenshot when perfection is just two clicks away?
Method 1: The Chrome Power User Move
The Google Chrome browser has a little-known, built-in feature that lets you grab the actual video frame grab data, often bypassing compression and giving you the cleanest result possible. This is the ultimate insider trick for a truly clean high-definition screenshot.
Setting Up Your Shot: Focus and Precision
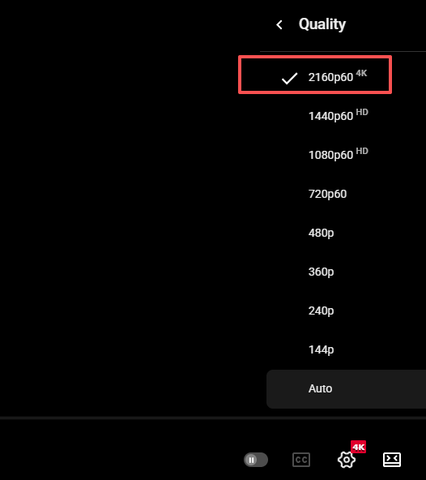
Open the YouTube video in your Chrome browser and set the quality (1080p, 4K) to the highest possible setting first. Critical tip: navigate a moment or two before the exact part you want. You want the video playing at that moment, not paused, to ensure a completely clean frame without any pesky control overlays.
The Magic Double Right-Click: Unlocking the Chrome Controls
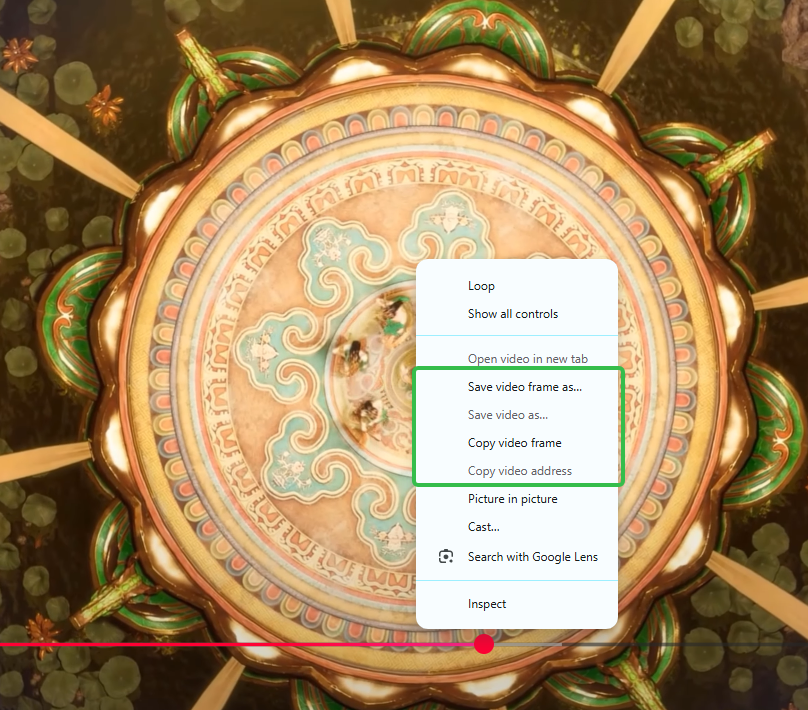
Here's the secret sauce. Right-click on the playing video. The YouTube menu pops up, right? Ignore it! Now, immediately right-click a second time on the same exact spot. You must be quick! This double-click action forces Chrome to ditch the YouTube menu and reveal its own secret video context menu. This is your key to capturing a clean YouTube video screenshot.
Capturing the Frame and Saving the Proof
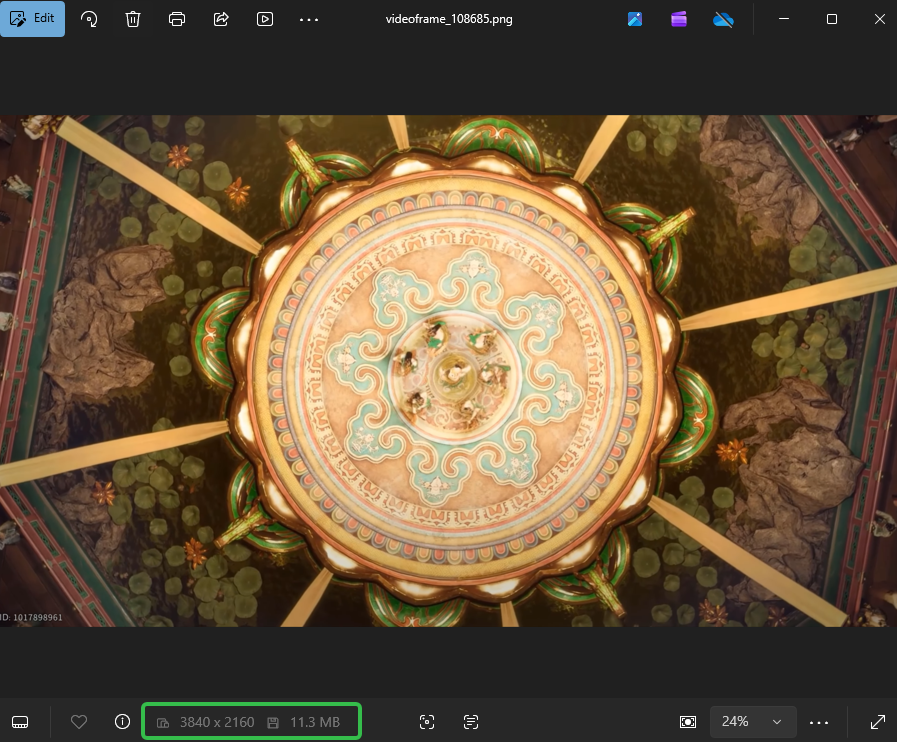
Look carefully down this new list of options. Click the one that says "Copy video frame." That perfect, HD quality image is now sitting patiently on your clipboard. If you mess up, you'll see the YouTube menu again, so just try the double-click one more time. Next, open your favorite image application—like Paint, Preview, or Photoshop. Hit CTRL+V or CMD+V to paste your pristine video frame grab. Save it, and bask in the glory of your perfectly clear high-resolution image!
Method 2: Speed and Snapping (When Time is Tight)
The Chrome trick is fantastic for quality, but what if you need something instantly? Regular keyboard shortcuts are still your fastest bet for a quick, decent YouTube video screenshot, but you must maximize the player and set the video quality to high first. Remember, garbage in, garbage out!
Windows Users: Snip & Sketch is Your Friend
On Windows 10 or 11, skip the old Print Screen button. The best tool is Snip & Sketch. Just press Windows Key + Shift + S. Your screen dims, allowing you to quickly drag a selection box around the video. It’s an efficient way to capture video frame content, but it does grab any elements like the browser frame, so make sure the video is full-screen!
Mac Users: The Command Shortcut
Mac users, you’re usually well-served by your native tools. Hit Command + Shift + 4, and then simply drag the crosshair over the video area. The high-definition screenshot file lands right on your desktop. It’s quick, it captures the moment, and it’s arguably the fastest option for a clean video frame grab when you’re in a rush.
Quick Pivot: Need to Convert or Compress that Video? (Beeconverter Guide)
Hold on a second. What if your whole project isn't just about a still image? Maybe you’ve grabbed a minute-long clip, not just a YouTube video screenshot, and now you need to change its format for a specific platform. Or, you’ve downloaded a massive 4K file, and it’s eating up your hard drive space!
This is the perfect moment to check out a utility like Beeconverter. Sometimes you need a powerful tool for more than just screen grabbing. Beeconverter excels at video format conversion, letting you turn weird formats into standard MP4s or MOVs. Crucially, it’s a killer video compression tool. You can slim down those enormous files, saving tons of storage while keeping as much of that glorious HD quality image clarity as possible. It's an essential tool for any serious content creator!

Wrapping It Up: Mastering the HD Frame
You came here tired of those frustrating, grainy blurry screenshots. Now, you’ve got two powerful methods in your arsenal: the deep-cut Chrome trick for the highest fidelity capture video frame, and the quick shortcuts for speed. No matter the method, you are officially done compromising on quality. Go back to that video, apply this YouTube screenshot guide, and grab that perfect, high-resolution image. Isn't it just amazing how much better the perfect shot looks? You’ve completely revolutionized your digital workflow.