How To Post VR Videos On YouTube: 360 Video Guide
William Davis | Updated on 2025-10-11
Why Bother with VR Videos on YouTube? (It’s Worth It!)
You’ve captured this incredible moment, right? A heart-pounding roller coaster ride or a stunning walk through a foreign city. And it’s all in VR video! Now, the big question looms: “How the heck do I get this masterpiece to an audience?” Seriously, stop overthinking how to post VR videos on YouTube. It’s not a technical mountain; it’s a molehill. Everyone else is uploading flat, two-dimensional content. You, however, are offering an experience. You’re inviting people directly into your world with an immersive 360-degree video. That’s how you instantly boost your channel’s cool factor. This is where the views are, where the dedicated subscribers live. A top-quality VR video upload to YouTube is your absolute advantage in a crowded digital space. Don't you want to stand out?
Contents
Step 1: Filming & Editing Your Killer VR Content
Gear Check: Do You Have the Right Camera?
Before tackling the upload steps, let’s talk basics. You need the right tools for the job. Is your camera truly spherical? Think professional gear like a high-end Insta360 or a dedicated 360 camera rig. If your footage has sloppy seams or visible stitching lines, viewers will immediately click away. VR video production relies on seamless capture. Pro-tip: make sure your recording is steady. Viewers can’t handle shaky footage in a headset; it’s a recipe for instant nausea. Your hardware choice is the first, crucial step toward successfully posting VR videos on YouTube.
Pro Tip: The Essential Edit Before Uploading
Editing a 360-degree video is different. You need to smooth out movement and, crucially, hide the elements you don't want seen, like the tripod or your own shadow. Use professional editing suites to stabilize any wobbles. Remember, your audience is navigating a sphere, so low-quality or jerky movement becomes exponentially worse. A tight, well-edited video encourages exploration. Don't let a boring opening kill the excitement. Nail the edit first. This prep work is non-negotiable before you even touch the YouTube platform with your VR video.
Step 2: Preparing Your Video for YouTube’s VR Magic
Wait, What’s a Metadata Injector? (And Why You Need It!)
This is the secret handshake, the one key step many creators miss. YouTube is smart, but it doesn't automatically detect your file as a 360 video. You need to embed specific data into the file itself. That’s what a metadata injector does. It adds a small, invisible instruction set that tells YouTube’s player, "Hey, this is spherical content! Load the 360 controls!" Without this simple injection, your masterpiece will just look like a bizarrely stretched-out flat video. Trust me, skipping this step will ruin your whole VR video upload to YouTube effort.
Quick Guide: Injecting Metadata Like a Pro
It’s surprisingly easy. Grab Media Metadata Injector tool, like Adobe Media Encoder. Download it, open your edited video file, and click 'Inject Metadata' and save the file with a new name (like 'video_injected.mp4'). You must upload this new, injected file. Don't upload the original. You’ve just completed the most technical part of posting VR videos on YouTube. See? I told you it was simple.
Step 3: Uploading Your VR Masterpiece to YouTube
The Simple Steps to Uploading
Ready? Just drag that new, injected file right into the YouTube upload window. Simple. While it uploads, write an attention-grabbing title. Use power words! Something like, "EPIC 8K Mountain Climb – Full VR Experience!" Use your description and tags wisely. Use keywords your audience is searching for: 360 video, virtual reality footage, and definitely YouTube VR. You want the algorithm to know exactly what you’ve got. This isn't the time to be vague.
Must-Do Settings for True VR Experience
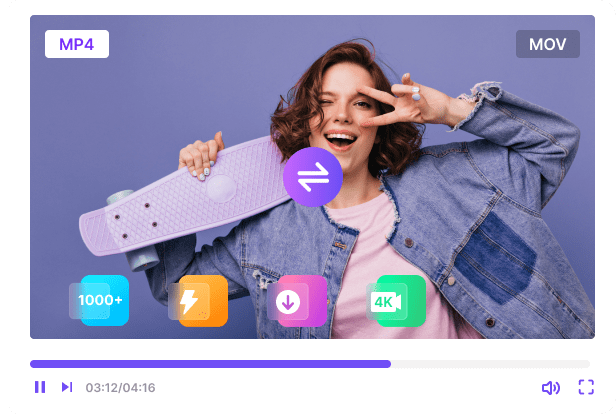
Once the file is uploaded, you have to be patient. High-resolution 360-degree video files take longer to process, especially for the 360 and VR quality levels. While you wait, check your resolution settings. For a good VR video experience, you must aim for 4K or higher. Why? Because the viewer is only seeing a tiny portion of that huge image at a time. If you upload a low-res file, that small view becomes blurry and pixelated. High quality is king when you post VR videos on YouTube.
Step 4: Troubleshooting Common Upload Issues
My Video Isn’t Showing as 360/VR – What Gives?
You uploaded it, but there's no little directional icon? No sphere to click and drag? First guess: Did you forget to inject the metadata? Seriously, go check Step 2 again. If you did inject it, the issue might just be time. Massive 360-degree video files can take several hours—sometimes even overnight—for YouTube's processors to fully activate the VR playback controls. Just wait it out. If it’s still flat 24 hours later, delete it and try the injection/upload process again.
Why Quality Matters for VR: A Reality Check
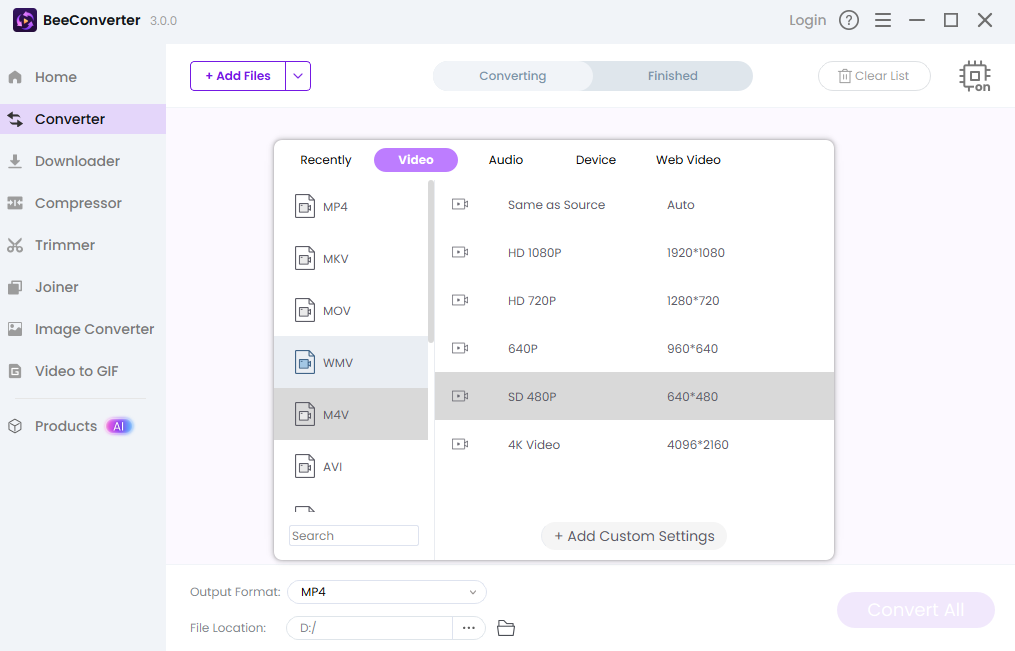
Let's face it, VR video content creation deals with gigantic file sizes and complex formats. Your camera might spit out a high-quality format that YouTube doesn't love, or maybe the file is just too unwieldy to handle quickly. You need a reliable sidekick to manage these technical hiccups. You need to convert, compress without losing quality, and ensure everything is formatted perfectly for YouTube before the upload step. Time spent fighting file types is time you aren't creating.
Ready to Go Beyond? An Essential Tool Recommendation
You shouldn't have to wrestle with formats and compression just to share your art. This is why you need a killer utility tool. Check out BeeConverter. This software is a serious game-changer for people dedicated to high-end VR video content creation. It accepts practically any video format your camera can produce and quickly converts it into a YouTube-ready file without sacrificing that precious high resolution. It’s perfect for managing the huge files associated with getting your 360-degree video properly prepared. Stop wasting energy on format compatibility and spend it on creating stunning, immersive worlds. BeeConverter just streamlines the whole process of how to post VR videos on YouTube.
Wrapping Up Your VR YouTube JourneyWrapping Up Your VR YouTube Journey
You made it! Posting VR videos on YouTube isn't scary; it’s just a checklist. Film high-quality content, edit wisely, use that essential metadata injector, and upload with the right settings. You now possess the keys to a completely different level of audience engagement. You are not just a video creator; you are a world-builder. Don’t let that incredible footage sit on your hard drive. Get it uploaded! Your viewers are waiting for you to take them somewhere amazing.