The Stealth Switch: How to Make Your YouTube Account Private
William Davis | Updated on 2025-10-11
We all have those digital corners we prefer to keep locked. Maybe it’s your deep dive into obscure vintage camera reviews, or perhaps it’s the embarrassing playlist of karaoke anthems. Whatever it is, your YouTube activity is yours, and you shouldn't have to broadcast it. That’s the real reason you're here: to figure out how to make your YouTube account private. Think of your public YouTube profile as a digital diary left wide open on a park bench. Making it private is like installing a biometric lock. You get to control who sees your subscriptions, your saved playlists, and your watch history. It's time to own your digital footprint and secure that private me-time. Are you ready to take the simple steps and learn how to make your YouTube account private right now? Let's dive in.
Ready to Lock It Down? How to Make Your YouTube Account Private, Step-by-Step
Securing your YouTube account is surprisingly painless. No complex code needed, just a few clicks. We’ll show you exactly how to make your YouTube account private on both your desktop and your phone.
The Desktop Dashboard: Quick Privacy on Your PC
1. Sign In Safely: Jump onto YouTube and ensure you’re logged into the correct channel.
2. Locate Settings: Click on your small, circular profile picture in the top-right corner. Scroll down and hit "Settings."
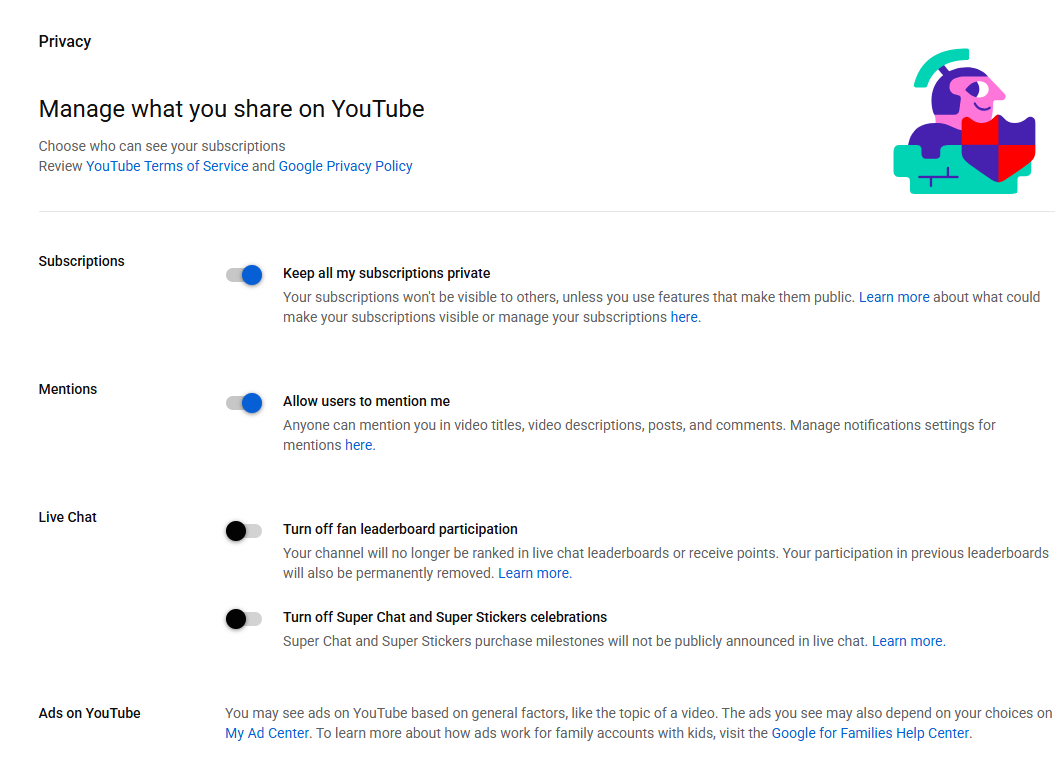
3. The Privacy Hub: On the left navigation bar, find and click "Privacy." This is your control center for making your YouTube account private.
4. Flip the Switches (The Key Move): You'll see three critical options under "Privacy settings." Toggle these switches ON:
- Keep all my subscriptions private: This is your shield. No one can see your favorite channels now.
- Allow users to mention me: Keep your 'thumbs-up' history sacred.
Done! That's the core process for how to make your YouTube account private from your computer.
Mobile Moves: Securing Your Account on the Go (App)
Your phone is usually within reach, making it simple to adjust your privacy anytime.
1. Launch and Log In: Open the YouTube app.
2. Access Your World: Tap your profile picture in the top-right corner.
3. Settings and Security: Scroll down to "Settings," and then select the "Privacy" option.
4. Mirror the Desktop: Just like on your desktop, toggle on "Keep all my subscriptions private," "Keep all my saved playlists private," and "Keep all my liked videos private."
Boom! Your private viewing habits are now safe, even when you're using the app. You've officially mastered how to make your YouTube account private across all devices.
Hold Up: What About the Videos I've Already Uploaded?
It's a common confusion: making your YouTube account private doesn't automatically privatize all your uploaded videos. Account privacy secures your activity; video privacy secures the content you share. This is a separate, vital step.
If you just need to lock down a single upload:
1. Enter YouTube Studio: Click your profile photo and choose "YouTube Studio." It's where the content creation magic happens.
2. Find Your Content: Click the "Content" tab on the left.
3. The Visibility Gate: Find the specific video. Under the "Visibility" column, change the setting (e.g., from "Public").
4. Select "Private": Hit "Save." That video is now viewable only by you and the specific email addresses you share it with. It’s the ultimate lockdown.
To privatize a large chunk of content: Go to "Content" in YouTube Studio, check the boxes next to the videos you want to change, click the "Edit" menu, select "Visibility," and choose Private. This is the bulk move for a seriously private YouTube account.
Pro Tip: Pre-Upload Management
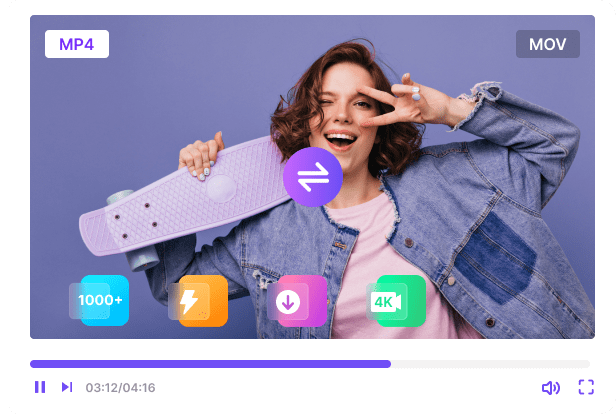
Before you even think about uploading a video (public or private), you might face issues like massive file sizes or weird file formats that YouTube hates. Dealing with video files is often the biggest headache. This is where you need a heavyweight champ in your corner. If you’re serious about your video library, whether you choose to make your YouTube account private or not, you need efficiency. Stop wasting time with clunky software. You absolutely need to try Beeconverter.
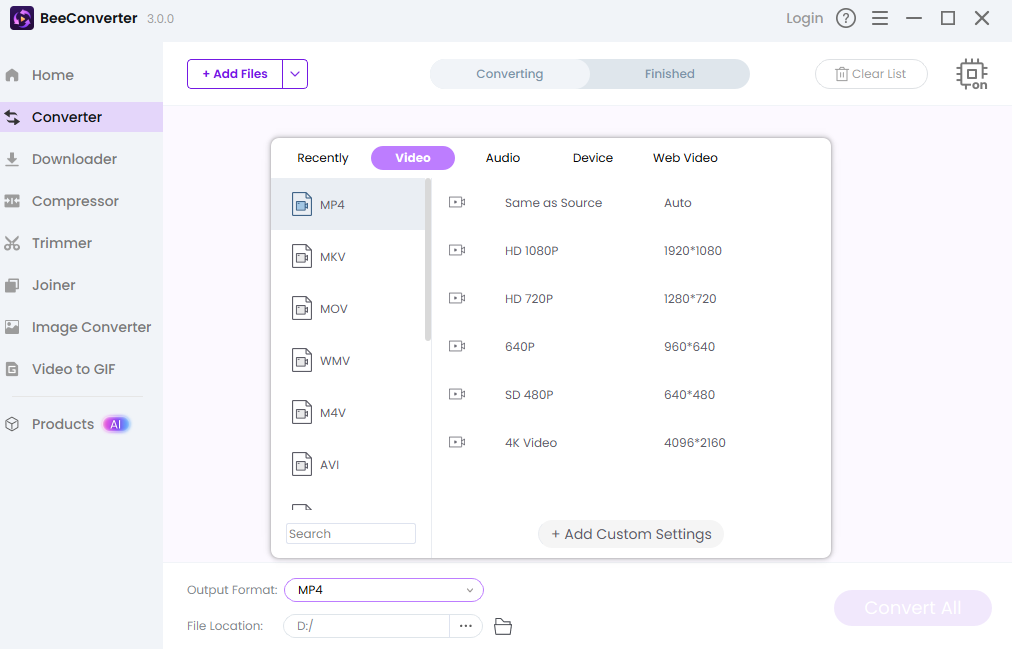
Why BeeConverter? Simple: It's lightning-fast, handles any format you throw at it, and can compress those behemoth files down to size without compromising quality. It’s the essential tool for managing your content before you decide its fate online. Using BeeConverter means cleaner, quicker uploads, which frees you up to worry about more important things, like how to make your YouTube account private in a comprehensive way.
Other Privacy Settings You Should Tweak
You've learned how to make your YouTube account private regarding subscriptions and likes. Now go further. In the same "Privacy" settings, look at your watch and search history. You can clear this history entirely, or even better, you can choose to pause it. Pausing your history is a fantastic temporary move if you're watching a bunch of random stuff you don't want YouTube using to profile your future recommendations. Taking control of what YouTube sees is just as important as controlling what others see. It’s your data—own it!
Final Thoughts
Congratulations, you’re now a YouTube privacy pro! By implementing these simple steps on how to make your YouTube account private, you’ve swapped the glass house for a fortified bunker. You have successfully put a boundary between your private viewing life and the public internet. Enjoy the freedom that comes with knowing your watch history, subscriptions, and playlists are now completely hidden. Remember, digital security isn't set-it-and-forget-it, but securing your private YouTube account is a massive win for your online peace of mind.